Docker部署Xray-Reality-VLESS
服务端
Xray + Reality + VLESS + Docker 的方案
docker-compose.yaml
使用官方原版镜像ghcr.io/xtls/xray-core:26.6.1
services:
  xray-core:
    image: ghcr.io/xtls/xray-core:26.6.1
    container_name: xray-core
    restart: unless-stopped
    network_mode: host ##性能好
    volumes:
      - ./config.json:/etc/xray/config.json

    command: ["run", "-c", "/etc/xray/config.json"]
config.json
注意: 不要设置 "flow": "xtls-rprx-vision",可能会造成Linux客户端不兼容.
{
  "inbounds": [
    {
      "port": 443,
      "protocol": "vless",
      "settings": {
        "clients": [
          {
            "id": "修改为你的UUID",
            "flow": ""
          }
        ],
        "decryption": "none"
      },
      "streamSettings": {
        "network": "tcp",
        "security": "reality",
        "realitySettings": {
          "show": false,
          "dest": "www.cloudflare.com:443",
          "xver": 0,
          "serverNames": [
            "www.cloudflare.com"
          ],
          "privateKey": "修改为你的PrivateKey",
          "shortIds": [
            "12345678"
          ]
        }
      }
    }
  ],
  "outbounds": [
    {
      "protocol": "freedom"
    }
  ]
}
需要修改的内容:
port: 修改为服务端开放的端口,默认是443uuid(clients.id):docker run --rm ghcr.io/xtls/xray-core:26.6.1 uuid生成UUID,或者cat /proc/sys/kernel/random/uuidprivateKey:docker run --rm ghcr.io/xtls/xray-core:26.6.1 x25519生成公私钥, 结果如下:
PrivateKey: xxxxx
Password (PublicKey): xxxxx
Hash32: xxxxx
PrivateKey私钥配置在服务端,Password (PublicKey)公钥配置在客户端
shortIds: 客户端要保持一致
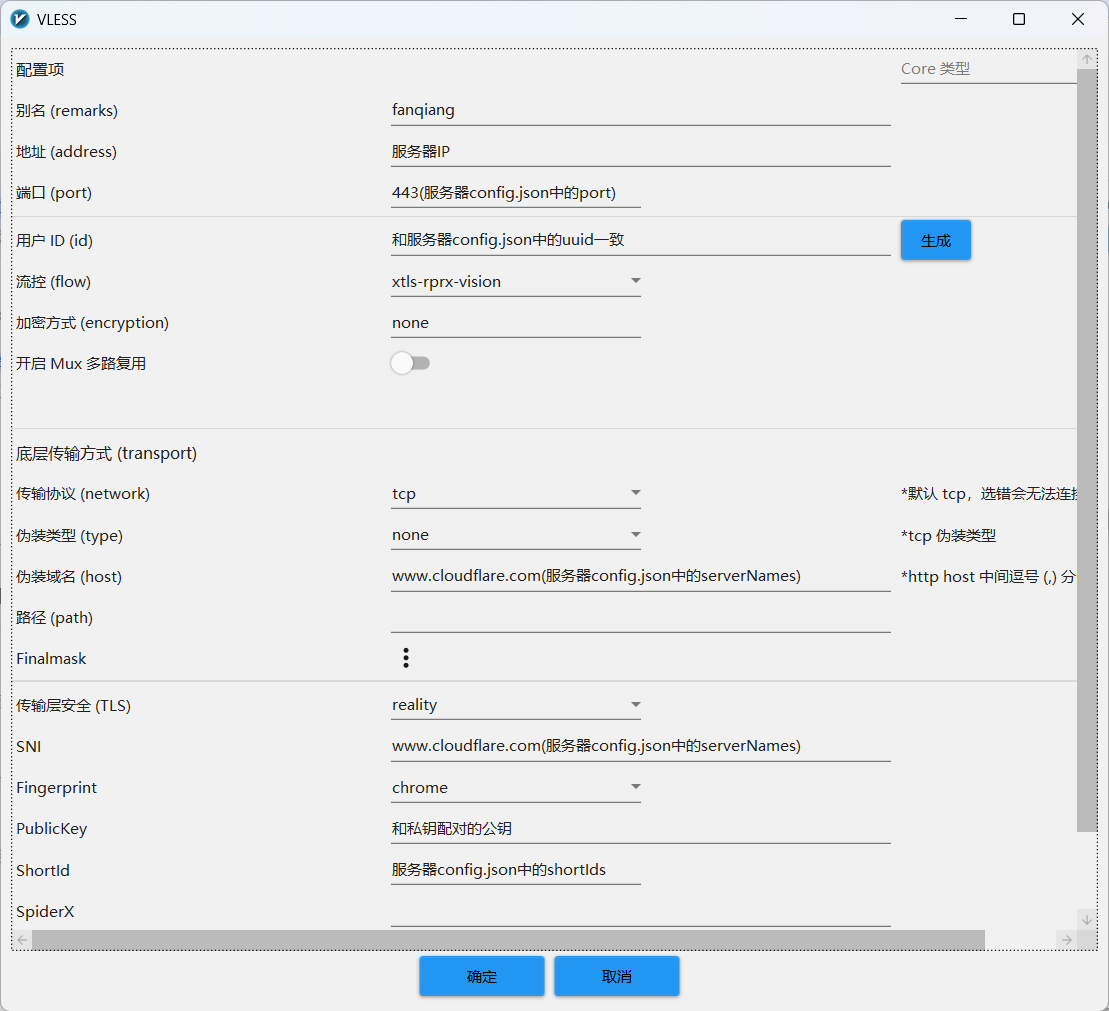
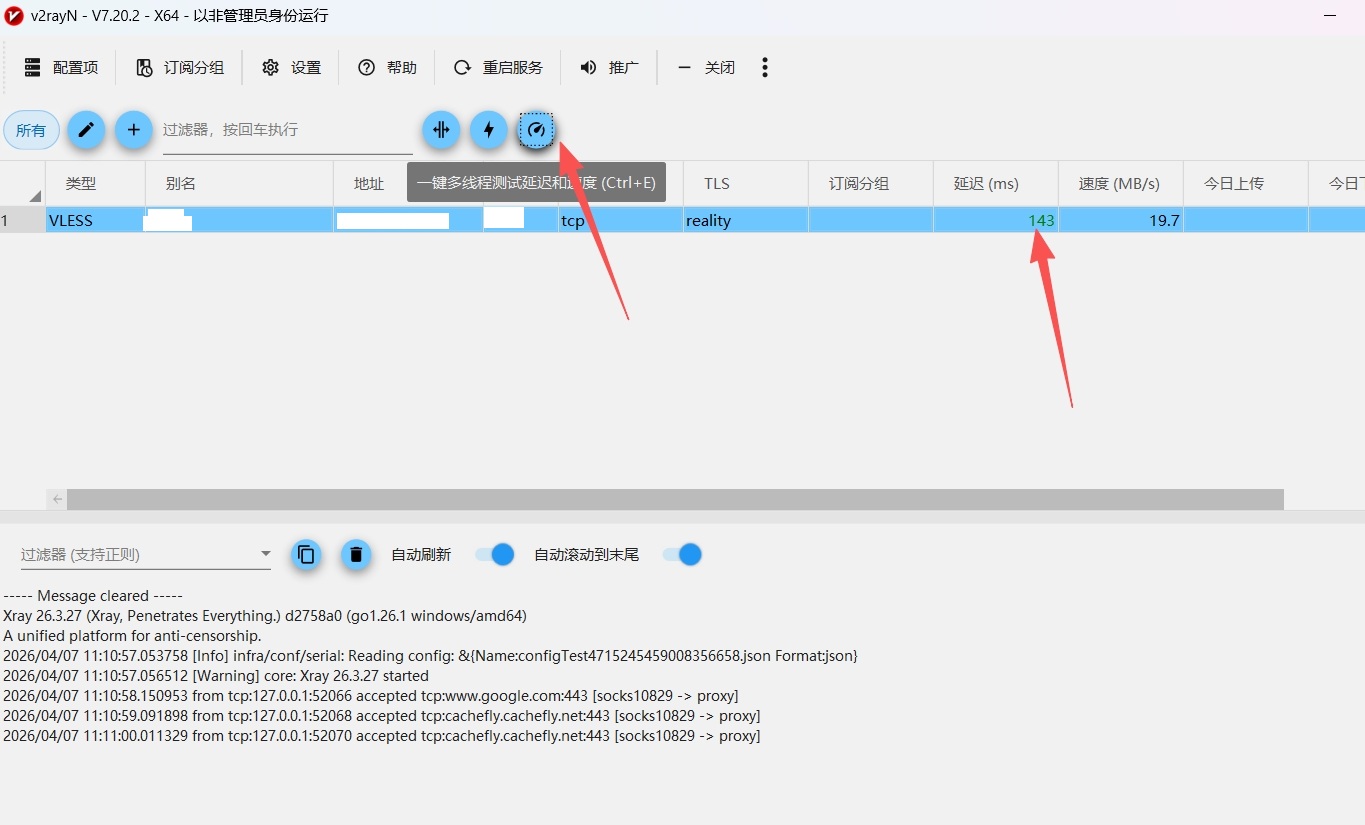
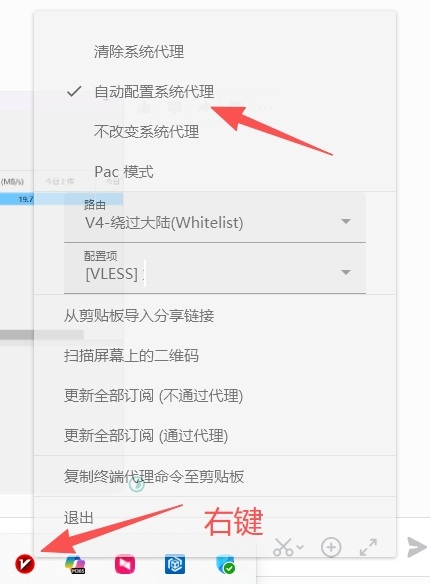
v2rayN 客户端
使用 v2rayN 最新版本, 选择 配置项-->添加[VLESS]
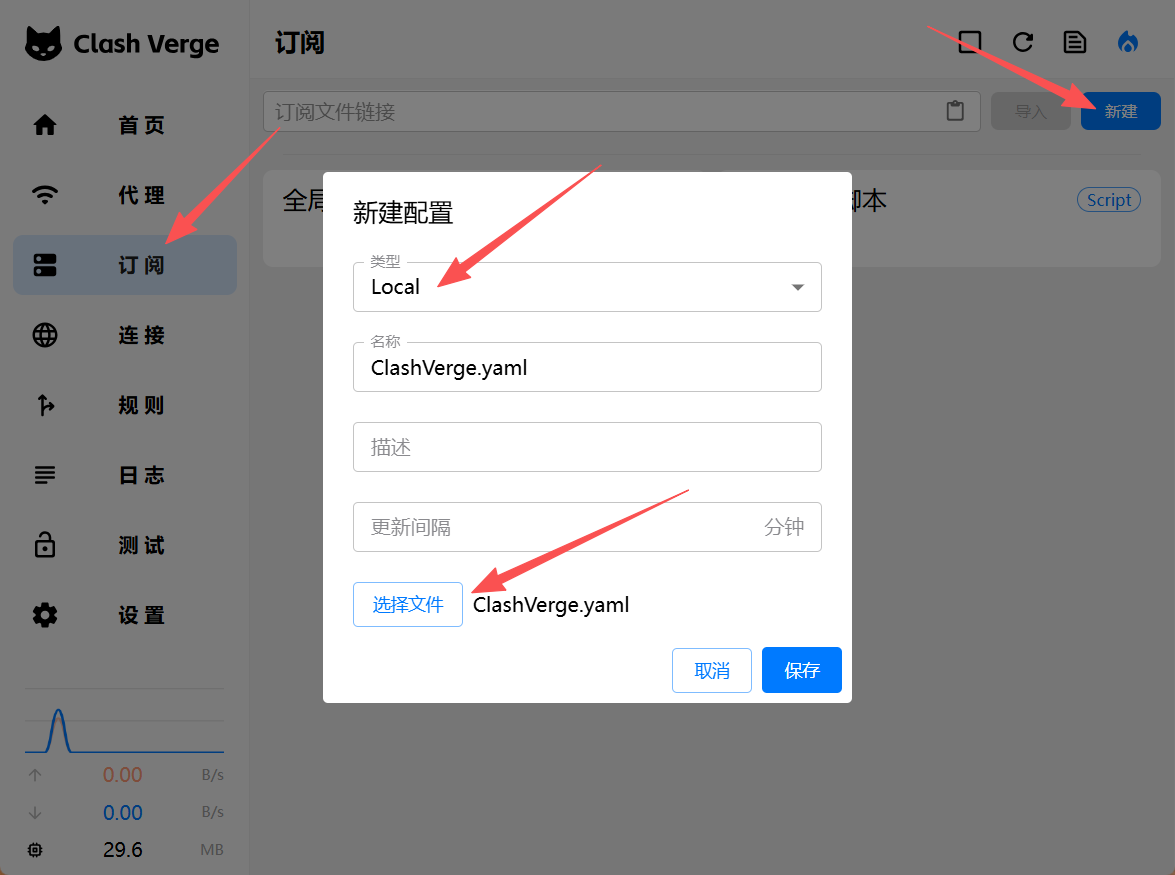
Clash Verge Rev 客户端
使用 Clash Verge Rev 最新版本,选择 订阅-->新建-->Local-->导入
ClashVerge.yaml
port: 7890
socks-port: 7891
allow-lan: false
mode: rule
log-level: info
external-controller: 127.0.0.1:9090

proxies:
  - name: "Xray"
    type: vless
    server: 修改为你的服务器IP
    port: 修改为服务器config.json中的port
    uuid: 修改为服务器config.json中的uuid
    udp: true
    tls: true
    network: tcp
    servername: 修改为服务器config.json中的serverName
    reality-opts:
      public-key: 修改为你的公钥PublicKey
      short-id: 12345678
    client-fingerprint: chrome

proxy-groups:
  - name: 🚀 节点选择
    type: select
    proxies:
      - Xray
      - DIRECT

rules:
  - GEOIP,CN,DIRECT
  - MATCH,🚀 节点选择
Linux 客户端
docker-compose.yaml 和服务端保持一致,config.json如下:
{
    "log": {
        "loglevel": "warning"
    },
    "inbounds": [
        {
            "tag": "socks-in",
            "port": 7890,
            "listen": "0.0.0.0",
            "protocol": "socks",
            "settings": {
                "auth": "noauth",
                "udp": true
            },
            "sniffing": {
                "enabled": true,
                "destOverride": [
                    "http",
                    "tls"
                ]
            }
        }
    ],
    "outbounds": [
        {
            "tag": "proxy",
            "protocol": "vless",
            "settings": {
                "vnext": [
                    {
                        "address": "修改为你的服务器IP",
                        "port": "修改为服务器config.json中的port",
                        "users": [
                            {
                                "id": "修改为服务器config.json中的uuid",
                                "encryption": "none"
                            }
                        ]
                    }
                ]
            },
            "streamSettings": {
                "network": "tcp",
                "security": "reality",
                "realitySettings": {
                    "fingerprint": "chrome",
                    "serverName": "修改为服务器config.json中的serverName",
                    "publicKey": "修改为你的公钥PublicKey",
                    "shortId": "12345678"
                }
            }
        },
        {
            "tag": "direct",
            "protocol": "freedom"
        }
    ],
    "routing": {
        "domainStrategy": "IPIfNonMatch",
        "rules": [
            {
                "type": "field",
                "network": "tcp,udp",
                "outboundTag": "proxy"
            }
        ]
    }
}
常用命令
## linux 设置和卸载代理
export http_proxy=http://127.0.0.1:7890
export https_proxy=http://127.0.0.1:7890

unset http_proxy
unset https_proxy

## windows设置代理
set http_proxy=http://127.0.0.1:7890
set https_proxy=http://127.0.0.1:7890